Sunday, August 11

Find Workers - Standard Report (Type: Search)

Find Workers

Find Workers is a very handy report for any HCM professional. As it helps you identify the desired group of Workers in your organization. Say For Example, you want to see Workers who are with a particular age, Work Type, Experience, Company, Location, Skills , etc.. This report can be used to identify test samples, to identify a set of workers and so on.

Find Workers is one of the Standard reports delivered by Workday. This is a best example for Search Report (One of the 8 Types of Report). 

Find Workers is a report which you can not edit, however you can clone it and work on the cloned copy.

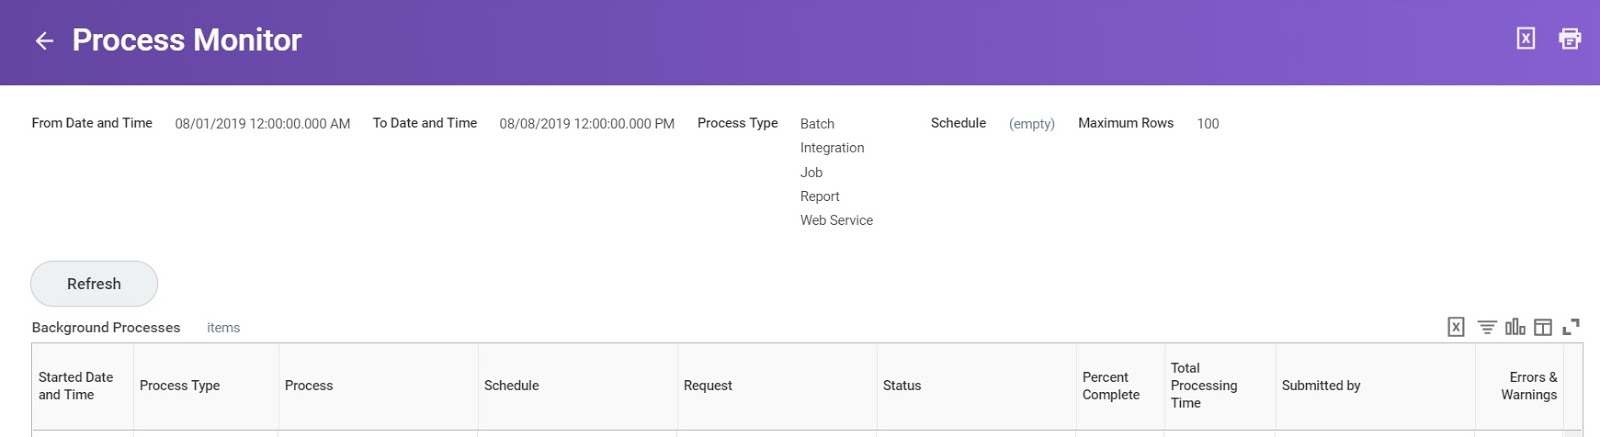
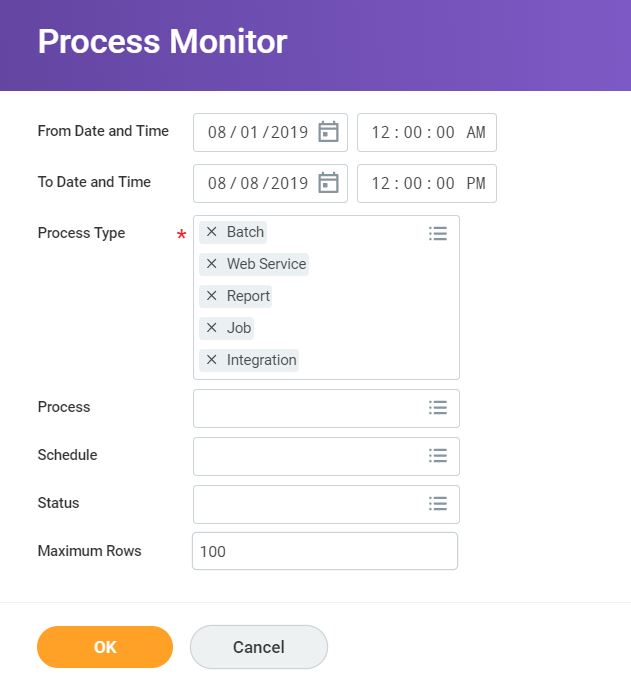
You can access this report by typing Find Workers in the search bar. Once you run the report, you can notice the categories on the left to filter the desired items.

You also have an option to save your search.


You can also compare workers.(Maximum 5 at a time) And you have the option to Add the workers to Pools. (  Candidate Pool, Talent Pool, Succession Pool)


Some other such reports related to HCM you may check are:

Find Workers for Swap Positions
Find Qualified Workers
Find Employment Agreements
Find Jobs
Find Candidates
Find Duplicates for Candidates
Find Events (BP Related Report)
Find Questions (BP Related Report)
Find Job Profiles
Find Succession Plans

Saturday, August 10

Reference IDs

Reference IDs


Reference IDs is something which you would realize that it is one of the important thing in Workday. This tells you how exactly the codes are stored and maintained at the back-end (OMS).

The Reference IDs will be used at the time of filling your templates in the excel sheets for EIB Inbound's or iLoads

Let us take an example of Gender Business Object, where you typically see Male, Female and Not disclosed. How does Workday stores the values of these? the answer to this is - In the form of Reference ID Value.

There are three tasks related to Reference IDs
  1. View Reference IDs - Just view 
  2. Maintain Reference IDs - Can set preferences and edit too
  3. Edit Reference ID - To edit a specific instance
Access the task View Reference IDs from search bar and key in the BO that you want to see. This is just view only of your Reference Ids.


Below screen shows the three instances of Reference IDs. Also notice the Reference ID Value pertaining to each of the instance. The Reference ID value of  "Not Declared" is empty


Access the task Maintain Reference IDs, below screen shows up. Here you have options based on what to display on the further screen. 

Include Empty Values Only-Returns all the empty reference id Values.  Example: Not Declared.
Include Defaulted Values Only - Returns all the defaulted values of the instances.
None of the above - Returns all the instances of the Business Object.


Up on Clicking OK on above screen, you can see the screen where you will be able to edit / maintain your existing Reference ID Values. Notice that we have added "Not_Declared"

Access the task Edit Reference ID where you can edit one Instance of your Business Object at a time. See below Example where we try to edit Reference ID - Not Declared.
Below is the screen which shows the Value that you can edit for your Reference ID.

Friday, August 9

Workday Feature - My Reports

My Reports


There are two ways to reach My Reports, one through search bar and the other one through your profile pic icon on your landing page. Once you hover the mouse over the profile pic icon you will see list of other features, there you can see My Reports.


Up on clicking the My Reports , you can see the list of reports that got generated already. It lists the first 10 items only. But if you want to see more, then you need to click on More Reports button.
My Reports

You need to give the number for how many days you want to pull the reports for.


It shows up different output files that "you" generated ranging from PDF to xls to xml's. You also have the option delete your reports as you are the owner of them

Thursday, August 8

Workday 33

Getting Ready for Workday 33


As we know we are currently on Workday 32 as of today (08/08/2019), there is a new release in the coming month Sep '19 i.e. Workday 33

August       3,  2019 - Features available for Preview
September 7,  2019 - Workday 33 will be available in all tenants

So we have the features available to preview in our preview tenants. Along with that, we get couple of documents where you can see and identify the new features or enhancements.

Below are the documents / resources you can follow:

Wednesday, August 7

Workday Process Monitor

Process Monitor


To check the status of various Jobs, reports and integrations, we use Process Monitor.

You can search for the task Process Monitor in the Search box or you can go to My Reports and access the task as highlighted below.


 On the Process Monitor task you need to provide the input parameters like From Date, To Date, Process Type, Process, Schedule and Status.

Process Type is mandatory and rest of the fields are optional. However it is advised to give both from and to dates which will narrow down your results.

  Process is the name of the process like report name, integration name, job name you are looking for in specific.
    Schedule is the recurrence or the frequency that you had set at the time of process scheduling.  (Ex:  Daily, Weekly, Monthly, Hourly)

    Status is about the process status whether Active or Inactive
Active Statuses: (Which are currently active in the process monitor)
  •  Initiated
  •  Processing
  •  Queued
 Inactive Statuses: (Which are not running anymore and inactive in the process monitor)
  • Aborted
  • Completed
  • Completed With Errors
  • Completed with Warnings
  • Failed
  • Not Run due to Exceptions on Future Process
  • Purged
  • Skipped
  •    The maximum rows that you can see at a time is 10,000. Its a good practice to view 100 at a time for better performance.


    Here is how the results would look like after you give your run / input parameters.